Showing posts with label markers. Show all posts

Wednesday, February 3, 2021

A Heart in the style of Romero Britto

 In the style of Ramero Britto

ROMERO Britto's  STORY

"Romero Britto, the founder of the Happy Art Movement has created a visual language of love, hope and happiness all its own that inspires millions worldwide. Brazilian-born and Miami-made, Britto is an international artist that uses vibrant, iconic imagery and fun patterns to reflect his optimistic view of the world around him. Self-taught at an early age, Britto painted on scraps of paper or cardboard or any medium he could find before coming into his own and traveling to Paris where he was introduced to the works of Matisse and Picasso. His appreciation of these masters influenced him to create an iconic style that The New York Times described, “exudes warmth, optimism and love”. Britto’s work has been exhibited in galleries and museums in over 100 countries".  britto.com


Romero Britto from the britto.com web site 


Please take a moment to watch this Romero Britto interview by Sasha  (Links to an external site.)


Heart Kids by Romero Britto


Lovely Dog by Romero Britto

Notice the letters in the grass. Romero Britto likes to us letters and

especially his name in his work. 


Flying Hearts by Romero Britto

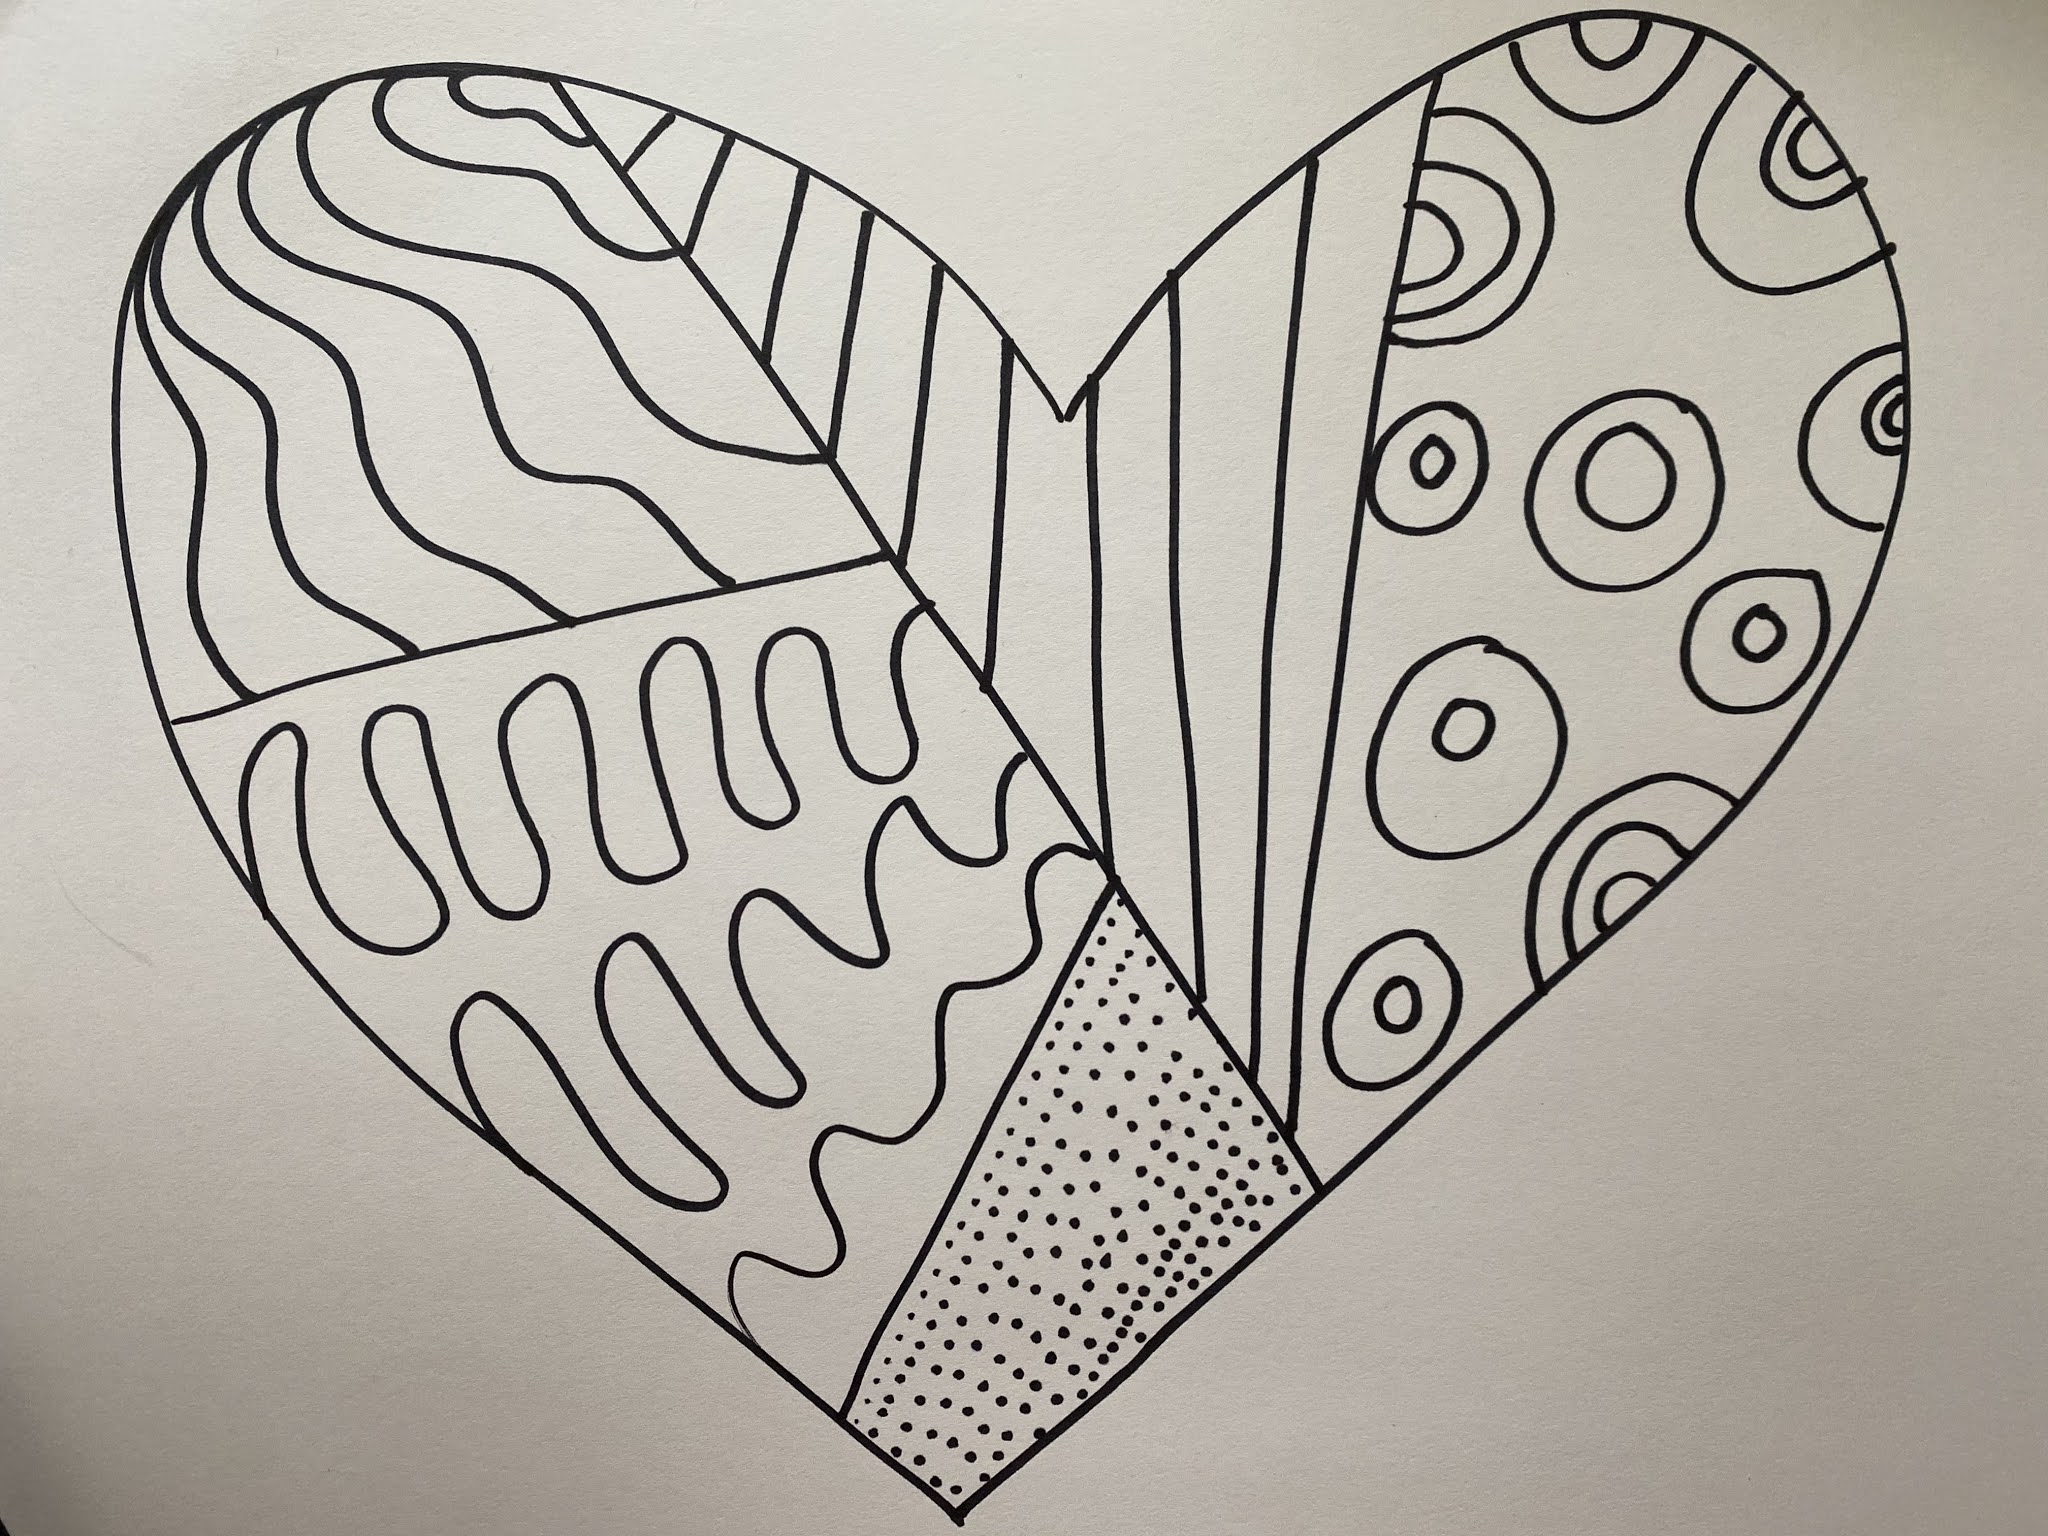
This is the art work we will look at to create our own Romero Britto styled heart.


Materials:

White paper

Sharpie

Water and a brush

Markers-Washable markers work best but you can use what ever you have.


Step 1. Using your Sharpie, draw the outline of a heart that fills the page.


Step 2. Draw 4 straight lines inside the heart to break it up into 5 different spaces. 


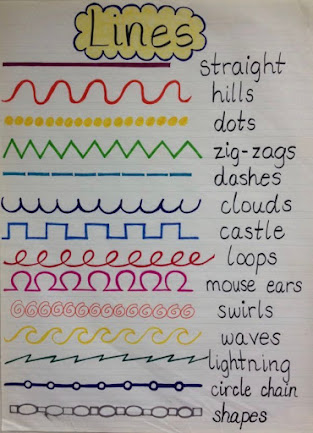
Step 3.  Fill 4 of the sections up with your favorite lines. 


Step 4.  Fill in the last section with your favorite shape.


  Step 5. Using your markers color 3 sections of your heart.


Step 6.  Get out a container of water and a paint brush. If you do not have

a paint brush your finger will do.


Step 7.   Make sure you put something under your art work like

a paper towel or a newspaper before you start. Using the paintbrush

paint the water over the marker and allow the colors to bleed together.

Pull some of the color into the 2 white spaces. You can let the color

bleed outside the heart as well.


Step 8.   Allow the paint to dry and then add your initials around the

border of the heart. Your initials are the first letter of your first name

and the first letter of your last name. For example my name is 

Lee Darter so my initials are LD. Romero Britto likes to use letters 

in his art work, let's try it too.


Bonus Idea...

Cut your heart out and glue it to black paper.


Make sure to take a photo and submit your heart art

into the Art Room Blog Facebook Page.

Wednesday, October 14, 2020

Henna Hands Project...

 the Elements of Art: Line


India Traditional Bridal Henna 

While body adornment dates back over 5,000 years, it's generally used today to express luck and happiness, and is often featured at ceremonial events like weddings and births. If you attend a traditional Indian wedding, henna will almost always be a part of the celebrations. Henna paste is made from a powder derived from the henna plant. It has been used for centuries as a natural dye for hair and nails as well. The temporary dye is now most  used as part of the Indian marriage celebration.


Photo Credit: Amit Dave/Reuters


To purchase these designs go to the ETSY shop of Eltendedero Crafts. 
She has some amazing things!
Click HERE 


Lesson 4. Design Hands

Step 1. Using a pencil, trace around your hand and part of your wrist and arm.


Step 2.  Turn our paper once to a different side. Using a pencil, trace around your hand and

part of your wrist and arm again. This hand will over-lap the first hand.


Step 3. Turn our paper once to a different side.Using a pencil, trace around your hand and part of your wrist and arm again. 

This hand will overlap the first two hands.


Step 4. Outline all your hands with a sharpie or black marker or pen. This may get confusing with all the overlapping 

hands so go slow and take your time.

.


Step 5. Using a sharpie create the henna designs inside your hands. Remember that

when ever you come to a line you need to change your design.


Step 5. You will be using markers for this project. Pick out several markers for your color pallet. Your pallet can be either cool or....warm.


or warm...


Step 6. Pick your first color and make sever dots on the page.


Step 7. Now pick your next colors and continue circling the dot until all of the negative space is full. The negative space is anywhere the hands are not. 


Remember the hands will stay black and white, only the background has color.


Sunday, September 8, 2019

2nd Grade Space Week Rocket to Another Planet...


 Each year we celebrate Space Week at the end of September. 
In second grade I have students think about what it would be like to travel to another planet. It is something they might actually get to do in their life time.

 The first step is to create a new world, a planet far away. 
What would the ground look like?
What would the new sky look like?
Draw your outlines using a black crayon and then use watercolor paint
to create your new planet.
 Next we use a straw to create Nebulas.
Place a very watery drop of paint on the paper and
then using your straw blow as had as you can to create
streaks in the paint.
I make sure to tell the kids not to share their straws and 
the straws much be thrown away as soon as you are done using them.


To create the rocket we use a separate sheet of paper and then color it with markers.
When the rocket has been colored students will cut it out and glue to on their new planet.