Showing posts with label STEAM Lessons. Show all posts

Saturday, September 7, 2019

1st Grade Cow Jumping Over the Moon...Getting Ready for World Space Week....

Each year at my school we celebrate Space Week, which is Friday Oct 4-Thursday Oct 10 this year (2019). This years theme is "The Moon: Gateway to the Stars"

 I love the image of the cow jumping over the moon. I had a student win the Judge's Choice Award in the TEXAS Art Educators Association Youth Art Contest back in 2009 for her cow over the moon. That painting hung in the Museum of Fine Arts Houston all summer that year. So proud of her. We are actually Facebook friends now that she is all grown up. I hope she remembers her elementary school art teacher when she is a famous artist!

Diana M. and (me) Lee Darter at the MFA Houston

So in honor of  World Space week I will read The Cow Jumped Over the Moon to my 1st grade and then we create art based on the work by Cally Jane Studios.

You can by the book on Amazon HERE

 Click HERE to go to Cally Jane Studios


Monday, January 14, 2019

Math and Art Reflective of Islamic Art Tiles...


You will need a pencil, a ruler and a 12 x12 inch sheet of 90# white paper.
You will also need watercolor paints when you are finished designing the tile.

Draw a line using a ruler from corner to corner.

Both horizontal and vertical 


You will need a 4 inch box. Start by placing the 2 inch mark on the ruler where the horizontal and vertical lines meet at the center of the paper.
Make a mark on the first line at 0 and 4 inches.

Now turn the rules to the other line and do the same thing.
You have created 4 marks on the lines...

Use the ruler to connect the 4 dots to create your 4 inch box.

 
Now you need an 8 inch box. Start by placing the 4 inch mark on the ruler at the center of your paper where the horizontal and vertical lines meet. 
Now place a mark on the line at the 0 and 8 inch measurements. 

Now turn the paper and do the same thing on the other line. 
Place your ruler at the 4 inch mark at the center of the paper and make a mark on the line
at the 0 and 8 inch measurements.

Now connect the 4 dots to create your 8 inch box.

Now put a line through the center of the 8 inch box.

And do the same thing on the other side.
After this step I tell the kids they are free to design at will. 
I do a demo but let them know that after this point their work does not have to look like mine. 

So I demo how to slowly connect the points and use the ruler to draw the lines. I remind them this is not a race and the ruler must meet at and intersection point, either one that is already there or one they can measure out on their own. Make sure you are focusing on where your ruler is lining up.

Continue the demo...remember that what you draw on one side you have to do on the other so that your tile is symmetrical. 

Finish demo...now it's your turn to add lines to your tile.

Create your own tile. Add as many lines as you like.


The last step is to use water color paint to symmetrically paint the tile.


Here is a great link to the Met Museum's Islamic patterned tiles information. 


My philosophy on teaching cultural/historical art lessons: 
Appreciation vs. Appropriation  

I think that we need to teach an appreciation of cultural art with the understanding that it is not ours to take. I think if we have kids look at the art “then make it their own” it is watering the art down and allowing it to move into popular culture. I think cultural/ historical should be studied as it is with an accompanying history listen and with the expressed understanding that it is not ours to take... only to look, study and appreciate.


Sunday, January 13, 2019

5th Grade Erosion Project....

I am working on a PBL lesson with the 5th grade team. We have an erosion problem on our playground. We are all working together to help the 5th grade students come up with a create a solution to the problem.
In art we looked at Georgia O'Keeffe's Ghost Ranch and created erosion art based on the photos. We used a lesson created Patty Palmer of Deep Space Sparkle or students could create something in their own style.

For the next step we created are work in the style of Carol Nelson

This is the piece I did at a recent workshop with Carol.


We used Stucco paste to create the hills.


Sunday, October 14, 2018

Parabolic Curve Sunflowers...

This is a very simple and easy way to add a STEAM project to you curriculum. The center of the sunflower is a Parabolic curve. Once you show this to the kids they will be drawing it everywhere. Their doodles will start to look like technical drawings. 

What is a Parabolic curve you may ask... It is a curve where any point is at an equal distance form: a fixed point (the focus), and a fixed straight line (the directix).  


I simply tell the kids it's a way to draw circles using only straight lines. They say "no way" and then fall in love with the process. 

To get started you will need a pencil, an ultra fine tipped Sharpie, a pencil, a ruler, a sheet of 12x18 white paper, a sheet of 9x9 inch black construction paper and a circular protractor. If you are not able to get a class set of the round protractors for your kids then just get one and trace it on white poster board, cut it out and number it..easy peezy!

Click HERE to buy the Circular Protractor on Amazon

Step 1.
Using a pencil trace all the way around the circular protractor.
Make sure the protractor is placed in the lower left corner of the paper making sure to leave room to add the petals for your flower.

Step 2. 
 Place a hash mark by each whole number.

Step3. 
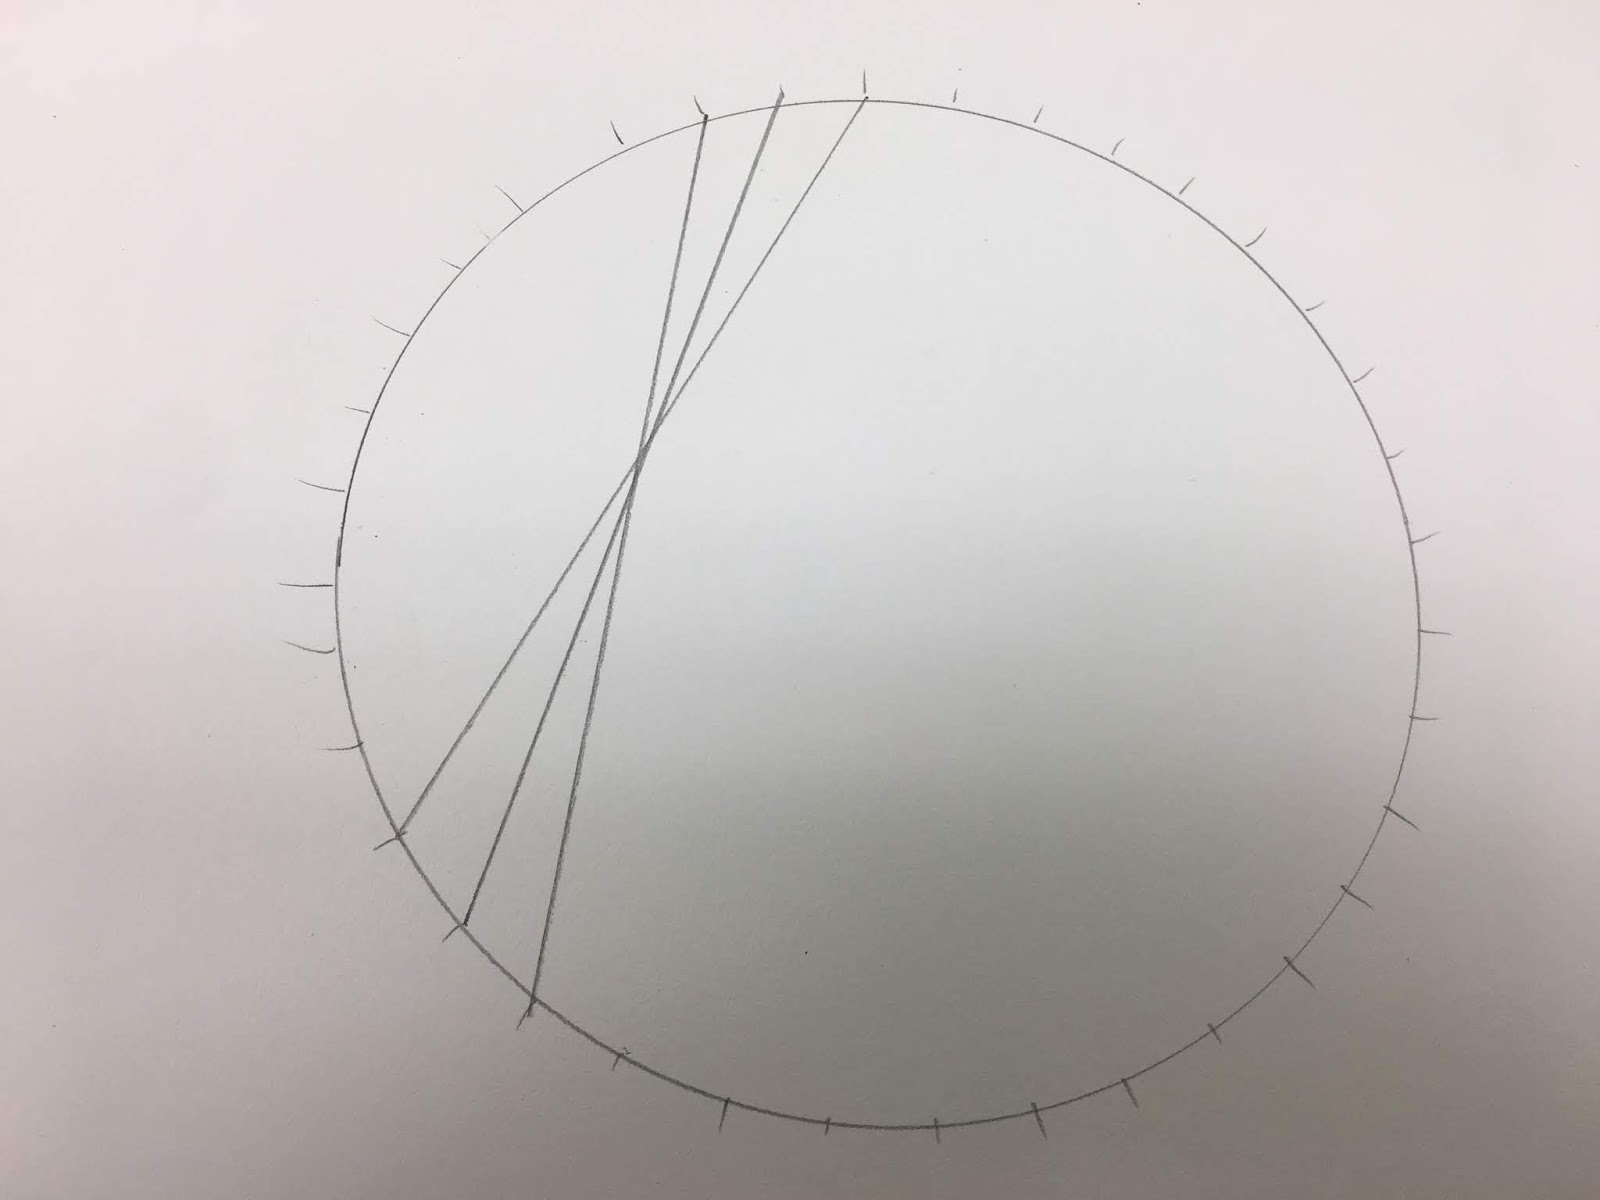
Using a ruler connect two hash lines together. It does not matter which 2 you connect on the first one. Keep in mind the farther apart the connections the smaller the center circle will be. The closer the connection the bigger the center circle.

Step 4. 
The next line connection will be the next two hash marks.

Step 5. 


You should continue all the way around the circle until every hash mark has 2 lines touching it.


Step 6. 
Put down your pencil an get a ultra fine tipped Sharpie.

Step 7. 
Repeat the same process however this time change the distance of your first line connection. 
Remember the farther apart the connections the smaller the center circle will be. The closer the connection the bigger the center circle.


Step 8. 
Using your Sharpie add the petals. Connect your petals from one hash mark to the next.
Also take this time to outline the large circle you drew with the protractor in Sharpie.

Continue...

All the way around your circle.

Step 9.
Watercolor paint... 
I used red-orange, orange and yellow at the last ring before the center.


I used yellow-orange on the petals and brown and yellow-orange at the center.

Step 10. 
Cut out your flower in a circle first then cut out each individual petal. This will make your life much easier!!! Cut out your petals in a bubble cut...meaning you leave a little white showing.

Step 11. (optional)

Use a round object or tool and run it around the outside edge of your flower between the flower and petals. 


This process will help you bend the petals up. 

Step 12.
Glue the Sunflower to the center of a sheet of 9x9 Inch black construction paper.

Step 13.

Use a stencil brush or toothbrush to splash brown watercolor paint over your flower.

Step 14.
Now use white tempera paint and flick it all over your flower and black paper.


The next section is optional...

Trace 1/2 way around your protractor, add the hash marks to EVER OTHER whole number.

Connect the petals to each hash line. Make sure these petals are slightly bigger then the previous ones you created on your flower.


Repeat the same step again this time trace slightly bigger then 1/2 the protractor. 


Out line them with Sharpie, paint them and then cut them out.
Attach them with glue around the outside of your flower.


TaDa....A parabolic sunflower.


Option...

You can use the circular protractor to connect the lines instead of a ruler. It's not a parabolic curve anymore but it's awesome!