Showing posts with label Collage. Show all posts

Friday, April 10, 2020

Collagraph and Collage......


Fish Collage

So with all the on-line teaching that is going on with the quarantine and the COVID-19 virus I have started my own You Tube channel. I have learned so many new programs in the past 3 weeks it's crazy! But I am so glad I have these new skills. 

My first lesson is about creating a collage and a collagraph print. 

A college is "both the technique and the resulting work of art in which pieces of paper, photographs, fabric and other ephemera are arranged and stuck down onto a supporting surface".
Tate Modern 


1. What are contour lines? Contour lines are lines that result in a drawing that is an outline. The French word contour means "outline". 
Cross contour — “lines that flow over the form of the object. A good way to understand this concept is to take your finger and move it slowly over the surface of an object, following a straight path. Watch your finger as you move it and try to imagine that it is leaving a line as it moves. Your finger will move and change direction according to the form”. Matt Fussell in Drawing Concepts

Collagraph and Collage YouTube video:


Saturday, September 7, 2019

1st Grade Cow Jumping Over the Moon...Getting Ready for World Space Week....

Each year at my school we celebrate Space Week, which is Friday Oct 4-Thursday Oct 10 this year (2019). This years theme is "The Moon: Gateway to the Stars"

 I love the image of the cow jumping over the moon. I had a student win the Judge's Choice Award in the TEXAS Art Educators Association Youth Art Contest back in 2009 for her cow over the moon. That painting hung in the Museum of Fine Arts Houston all summer that year. So proud of her. We are actually Facebook friends now that she is all grown up. I hope she remembers her elementary school art teacher when she is a famous artist!

Diana M. and (me) Lee Darter at the MFA Houston

So in honor of  World Space week I will read The Cow Jumped Over the Moon to my 1st grade and then we create art based on the work by Cally Jane Studios.

You can by the book on Amazon HERE

 Click HERE to go to Cally Jane Studios


Monday, January 28, 2019

2nd Grade Roosters Using Scrap Painted Paper...


We have had several snow days lately and when that happens it throws of my next day schedule off.
 I have my students save all the painted paper scraps they create. I have a scrap bin for all the leftovers. This bin comes in handy for a lot of projects and quick ideas....which I desperately needed on this day. These roosters were created by 1st grade using the scrap bin


The head, body and wing are cut in the shape of the letter U. I have my kids hold up their magic drawing finger and draw the letter U in the air. I tell them if they can draw the U then can create this rooster. Make sure to erase the U in the air so it is not hanging over you while you try to work. 

The legs are just rectangles, the eyes are circles and the beak is a triangle. If they would like to add feet those are just triangles as well.
When you break it down into simple shapes the kids then realize it is something they can easily do.
I always start all my demos by asking my students "does your bird (or whatever) have to look like mine". They tell me no. I let them know this is just one way to cut out their bird. If they have another way they can do that instead. 
This helps the kids that need the extra nudge and also allows the others to make their own creative choices. 

The last step is to add the feathers. I let the kids know they feathers are simple football shapes. Or 2 curved lines facing each other. 


Such personality!


Cute, fun and easy peezy! 

This child went for more of a parrot look. 
Love it!

Wednesday, January 17, 2018

Valentine's Day Heart Art...


1st Grade
Gridded Hearts
Click HERE for Step-by-Step instructions

Kindergarten/ 1st Grade 
What to do with all that scrap boarder paper?
Click HERE for Step-by-Step instructions

2nd Grade
In the style of Molas 
Click HERE for Step-by-Step instructions

3rd Grade
Donated music sheets? Why yes I will take that!
Click HERE for Step-by-Step instructions

4th Grade
4 Part Heart
Click HERE for Step-by-Step instructions


5th grade
Complimentary Colors/ Value Changes
Click HERE for Step-by-Step instructions

Art Club
Printmaking/Positive/Negative Space
Click HERE for Step-by-Step instructions


Sunday, January 7, 2018

Bamboo at Night...


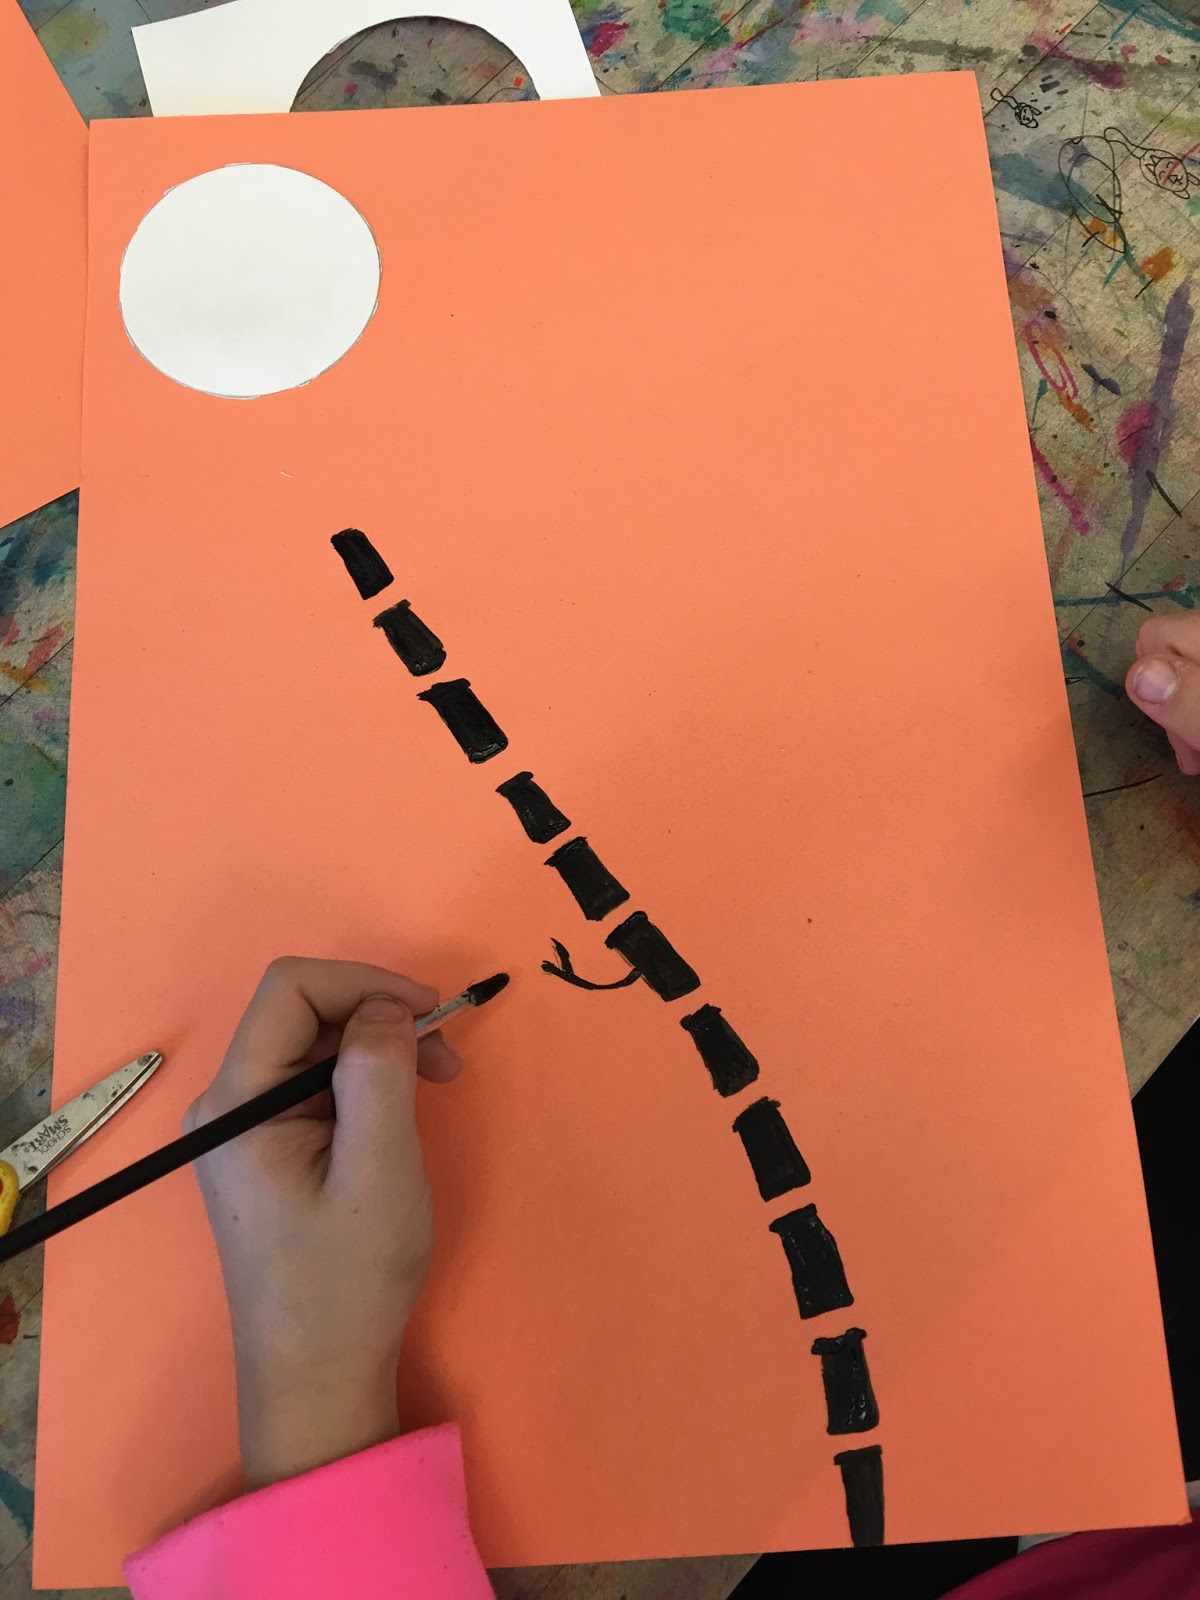
5th grade students started by using circle tracers to cut out their moons. I gave the kids a 6x6 inch piece of white paper for the moons.
Then we glued the moon to 12 x18 inch orange construction paper.
Some students painted their moons gray or added craters.

Using watered down black tempera paint start at the bottom of the paper and create 2 or 3 bamboo shoots that cross over each other. We left spaces between the shoot sections were the orange paper showed through.

Add leaves of the bamboo


Friday, January 5, 2018

Painted Paper Color Wheel Forest...

3rd grade created a collage painted paper color wheel forest...

It was snowing in some of the forests.


Cutting, gluing, pasting.. all in a day's work in the elementary art room!

Layering up the forest.

My tables are arranged by color...Red, Orange, Yellow on one side (the warm side) and Green, Blue and Purple on the other (the cool side). To prep for this lesson each table painted 6 sheets of 12x18 90# white paper with different shades of the same color. The color they painted corresponded with their own table color. 
When the papers were finished they were all put on the drying rack for next week. If students finished early they could help other tables finish their paintings or work in their own art journals. 

The painting step of the lesson took almost the entire 45 min. class. You would think it would go faster since they are just randomly painting one color but NOOOOOO.... I do only have 4 kiddos at each table and they did have to paint 6 papers pre table so there you go. 
Do not have the kids put their names on the papers. This is so they will no try to claim them for their own in the next phase of this project.


In the next week's phase of this project I randomly handed out one color of each sheet to every table. So each table received a full color wheel. I also gave each table one sheet each of dark gray, light gray and white constructions paper.
The instructions were to create a color wheel forest. Students much have 3 snow capped mountains using the grays, a sun and some clouds. The style and manner of cutting was up to each student.


This is our inspiration piece for this project, it is from Painted Paper. Click HERE for the link.
Painted Paper is an amazing web site run by Laura Lohmann. Click HERE for her site.
I believe Laura created this as a mural with her kids. 

Monday, June 19, 2017

4th Grade Birch Tree Sunset in the Show...


First students painted a colorful sunset on the upper 2/3rds of 12x18 inch #90 white paper help vertically or portrait. 


Next students tore strips of with paper and painted the edges blue. The strips are glued onto the bottom 1/3rd of the paper in layers to create the illusion of snow banks.

After the snow banks are added students cut out 2 Birch trees. We used sharpies to create the lines. I also discussed how the trees closer to you will be bigger then the trees farther away....some of them got it....and well, some not so much. I added a follow up lesson on distance!


The last step is to put the finish piece in the "snow machine" and using a toothbrush and white tempera paint splatter falling snow all over the project.


If you have ever seen the Movie Mystery, Alaska there is a seen inside the elementary school house with lots of kid's are work on the walls.  I could never get in close enough to see the actual project on the movie but that is where this idea came from.